
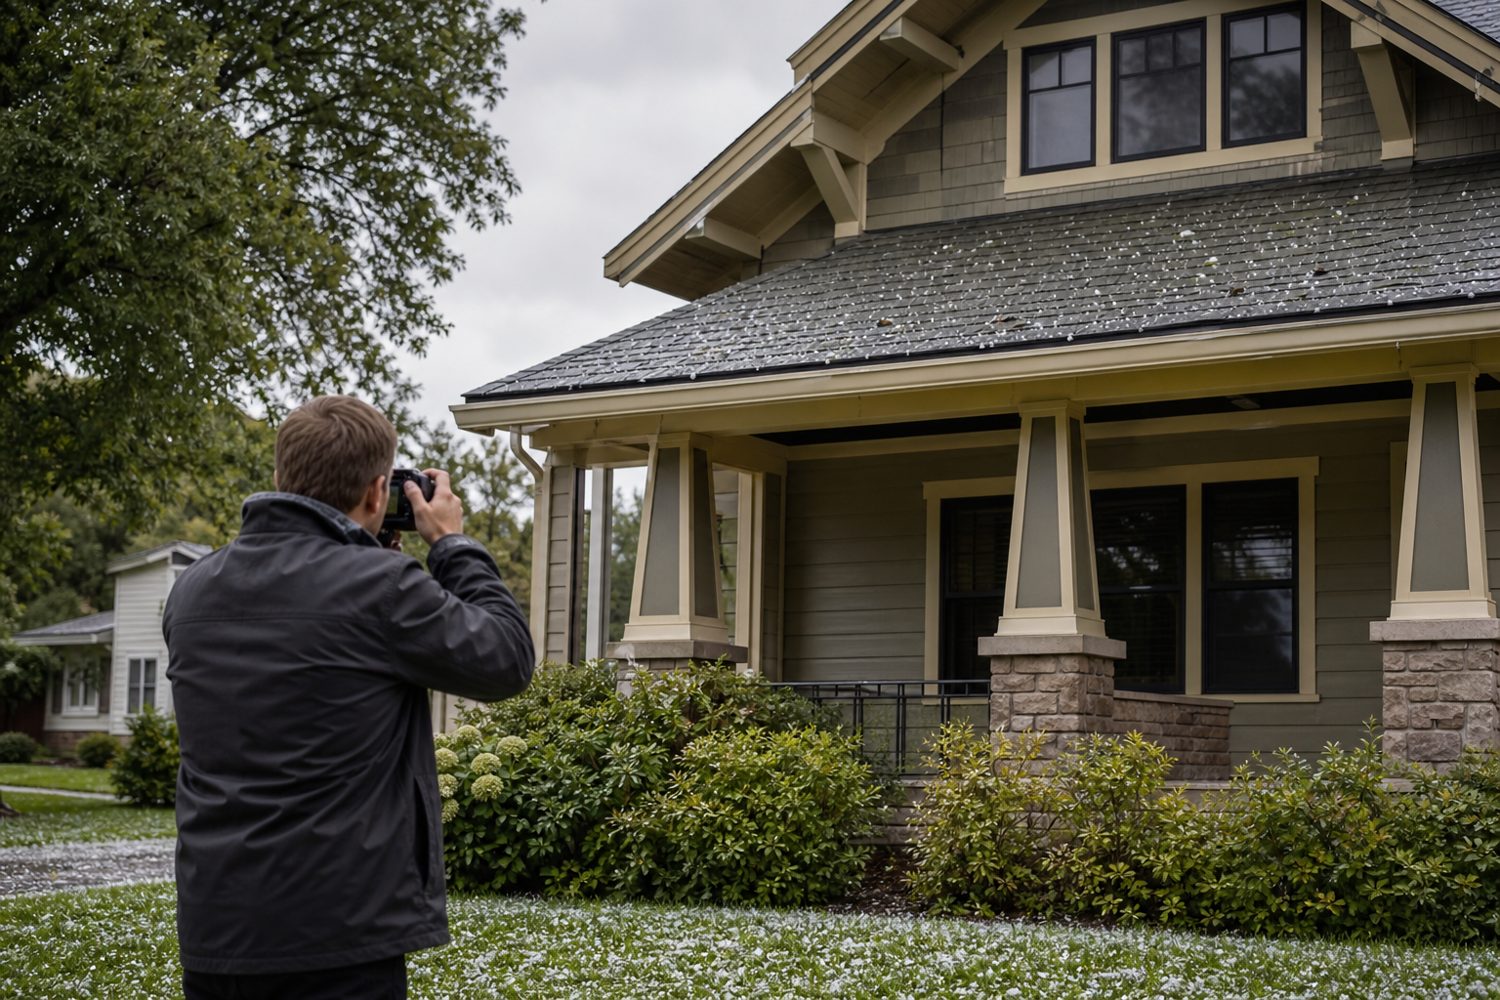
Begin with safety, not shingles
Hail often arrives with lightning, high wind, standing water, broken branches and unstable utilities. No photograph is worth a fall. Stay on the ground, keep away from downed conductors and wait until active weather has cleared. A homeowner can create an excellent first record from windows, doorways and public grade. Use the same orientation for each image: front, right, rear and left elevation; then closer views of gutters, downspouts, screens, painted trim, outdoor equipment and debris. This establishes a pattern without stepping onto the roof.
Build a time-stamped record
Write down the date, approximate start and end time, hail size only if safely observed, wind direction if known, and the first moment you noticed water or exterior change. Save weather alerts and photographs in one folder. If water is entering, photograph the interior stain before moving belongings, then document temporary protection and every invoice. Avoid statements that assume cause. A clear observation such as ‘water appeared at the north bedroom ceiling at 8:40 p.m.’ is more useful than a confident diagnosis made before inspection.
Understand what hail evidence looks like
On asphalt shingles, potentially relevant evidence may include displaced surface granules, a fresh impact depression or fractured mat. But blisters, foot traffic, manufacturing variation, tree abrasion and long-term granule loss can resemble storm effects. Soft metals may show directional dents, yet their gauge and prior condition matter. Window screens, downspouts, painted vents and plant damage add context. A credible assessment looks for distribution and consistency across multiple surfaces rather than elevating one ambiguous mark into a conclusion.
Read wind as a fastening problem
Wind effects are not limited to missing shingles. Tabs may lift and reseal, crease near the seal strip, tear at fasteners or loosen along rakes and ridges. Installation history matters: high nails, inadequate fastening, poor adhesion, brittle age and previous repairs change how a roof reacts. The inspector should document roof slope, orientation and edge zones, then distinguish observed condition from probable mechanism. This distinction keeps a repair scope technically useful even when insurance questions remain unresolved.
Treat leaks as pathways
The visible ceiling stain is rarely directly below the exterior entry point. Water can travel along decking, rafters, underlayment, wiring or insulation before appearing. Valleys, sidewalls, chimney intersections, skylights, plumbing vents and roof-to-wall transitions deserve careful attention. Ice dams and wind-driven rain can also expose vulnerabilities unrelated to hail. Moisture readings and attic observations, when safely accessible, help separate an active pathway from an old stain.
Use temporary work carefully
Temporary protection should stop additional entry without creating a new hazard or destroying evidence. Photograph conditions before and after work. Ask the contractor to describe materials used, attachment method and areas covered. Keep removed fragments when practical. Broad applications of sealant can hide the failing transition and complicate permanent repair. Interior drying should begin promptly; track fans, dehumidification and affected finishes, especially where insulation or wall cavities became wet.
Prepare for a professional assessment
Share your timeline, photographs, maintenance history and known prior repairs. Make attic access available if it can be reached safely. Ask the inspector to label photos by elevation and component, identify limitations, and separate storm-related observations from age or workmanship. A good report states what was seen, where it was seen and why it matters. It should not guarantee that an insurer will pay. Policy interpretation and claim decisions remain with the carrier and adjuster.
Compare repair and replacement logically
A localized repair may be appropriate when damage is limited, materials are available, surrounding shingles remain serviceable and required flashing can be integrated. Replacement may be more practical when effects are distributed, brittleness prevents lifting adjacent courses, matching is materially unavailable or the repair would leave critical transitions compromised. Code requirements, ventilation and underlayment should be addressed in either path. Price alone cannot answer whether a technically complete repair is possible.
Review the scope line by line
A roofing scope should identify tear-off assumptions, decking allowance, underlayment, ice-barrier locations, valleys, flashings, vents, pipe boots, ridge treatment, gutters, protection, cleanup and permit responsibility. It should explain how siding or masonry interfaces will be handled. Confirm product, color and substitution rules. If insurance is involved, compare the contractor scope and carrier estimate by quantity and operation rather than just bottom-line totals.
Close with a durable record
After work, keep the signed scope, change orders, permit record, product data, warranties, final invoice and photographs of concealed details. Record shingle manufacturer, line and color, and store a small quantity if provided. Check the attic and ceilings after the next significant rain. Clean gutters once debris has finished shedding. A complete closeout file turns an anxious storm event into a legible chapter in the life of the house.
Create photographs that can be compared
Stand in repeatable locations and include enough surrounding context to orient each close view. Start with the full elevation, then a component, then the condition. Do not rely on digital zoom when moving closer from safe grade gives a clearer image. Place a ruler beside a mark only when you can do so without touching or altering it. Photograph the same gutter, vent or screen from two angles so reflected light does not masquerade as deformation. Preserve original files with metadata, and work from copies if you need arrows or notes. A labeled sequence is easier for a contractor, adjuster or engineer to audit than dozens of disconnected close-ups.
Know the limits of weather reports
Public hail maps and neighborhood reports can establish that severe weather was possible near a location, but modeled swaths are not measurements at a particular roof. Hail size and wind vary over short distances because of tree cover, building shelter, storm motion and reporting gaps. Use weather data as context for a physical assessment, not as a substitute for it. Save the source, retrieval date and time zone. If a report uses radar-estimated hail rather than a trained observer, retain that distinction. A technically honest record connects regional conditions with consistent site evidence without claiming precision the data cannot support.
Separate maintenance from storm response
A post-storm visit often reveals unrelated maintenance: brittle sealant, clogged valleys, rusted fasteners, old pipe boots, detached downspouts or siding too close to a roof surface. These issues still deserve attention, but combining every condition under one cause weakens the record. Ask for observations to be grouped as probable recent effects, long-term aging, installation concerns and items requiring further investigation. That structure helps prioritize active water paths while preserving a fair account of the house. It also supports sensible decisions when an insurer covers one operation but routine maintenance or improvement remains the homeowner’s responsibility.
Invite useful contractor questions
Ask whether the inspector accessed the roof, what safety method was used, which slopes could not be evaluated and whether photographs correspond to a diagram. Request the reason behind each recommended operation. If replacement is proposed, ask why a repair cannot be integrated and whether brittleness, discontinued material, code, flashing access or distributed damage drives that conclusion. If repair is proposed, ask how adjacent shingles will be lifted, how color variation will be handled and what workmanship coverage applies. Clear answers should describe methods and limitations rather than pressure you with a storm-season deadline that is not tied to safety, policy or material availability.
Coordinate with the insurance process
Read your own policy notices and contact the carrier through its official channel. Contractors can provide measurements, photographs and scopes, but should not act as unlicensed adjusters or promise a settlement. Keep a communication log with dates, names and requested documents. Compare estimates by roof squares, linear feet, individual components, labor operations and tax rather than assuming differently formatted totals represent the same work. If a supplement is needed, it should explain a documented quantity, code requirement or necessary operation. Never sign over unrestricted authority or accept an instruction to conceal a deductible. Your agreement should state price, payment timing and cancellation terms plainly.
Check the rest of the exterior
Hail and wind do not respect trade categories. Walk the siding, window wraps, screens, fascia, soffits, gutters, downspouts, exterior lights, mechanical equipment and detached structures from safe locations. Look for fresh chips, directional dents, displaced pieces and impact patterns while noting pre-existing corrosion or wear. Inside, inspect top-floor ceilings, attic areas that are safely accessible and walls below roof-to-wall intersections. Photograph landscape and tree debris as context, but do not infer roof damage from leaves alone. A whole-property review reduces the chance that a small but consequential opening is missed while attention remains fixed on shingles.
Use the next rain as a verification event
After temporary or permanent work, observe the home during and after a steady rain if it is safe. Check previous stain locations, attic surfaces visible from a safe platform, gutters, downspout discharge and wall intersections. A dry ceiling immediately after repair is encouraging but not absolute proof; wind direction and rainfall intensity may differ from the original event. Mark old stains lightly or record moisture readings so new change can be distinguished. Report renewed water promptly and avoid painting over evidence until the assembly has dried and the pathway is resolved. Verification is a planned step, not an assumption at invoice time.
Questions to bring to the table
Ask what is observed, what remains uncertain, which details will be concealed, how substitutions are approved, what maintenance is expected, and which records you will receive at closeout. Those questions apply whether the next step is monitoring, localized repair or coordinated replacement.
Closing note
This guide is general educational information, not an engineering opinion, code determination, insurance coverage decision or diagnosis of a specific property. Conditions vary. Use qualified local professionals and follow manufacturer instructions, permits and applicable Minnesota requirements.